Introduction
This document describes how to build and run the Azure IoT Hub application on your LattePanda.
This multi-step process will explain how to:
- Prepare your development environment
- Configure Azure IoT Hub
- Register your IoT device
- Build and deploy Azure IoT SDK on your device
- Run your Sample and send data to the Azure IoT Hub
About This Document
This tutorial is adapted from this link . The functions themselves have been adapted for the LattePanda SBC. This sample uses Node.JS. Click here for more language options and additional tutorials.
What’s Azure IoT Hub?
Microsoft Azure is a cloud computing platform and infrastructure created by Microsoft for building, deploying, and managing applications and services through a global network of Microsoft-managed data centers. Azure IoT Hub is a fully managed service that enables reliable and secure bi-directional communications between millions of IoT devices and an application back end. Azure IoT Hub offers reliable device-to-cloud and cloud-to-device hyper-scale messaging, enables secure communications using per-device security credentials and access control, and includes device libraries for the most popular languages and platforms.
2 Steps to Run Azure IoT Hub Application
Step 1: Prerequisites
You should prepare with this checklist before beginning the following process:
- Make sure you have a computer with Git client installed and access to the azure-iot-sdks GitHub public repository.
- Prepare your development environment.
- Set up your IoT Hub
- Check your device's provisional use and credentials
Step 2: Build and Run the Sample Code
- Get the following sample json files from GitHub Azure
-
package.json
-
simple_sample_device.js
- Place the files in the folder of your choice within the target machine/device
- Open the file simple_sample_device.js in a text editor.
- Locate the following code in the file:
var connectionString = '[IoT Device Connection String]';
-
Replace
[IoT Device Connection String]with the connection string for your device. Then, save the changes. -
From the shell or command prompt you used earlier run the iothub-explorer utility, and use the following command to receive device-to-cloud messages from the sample application (Substitute
[iot hub connection string]with the IoT Hub connection string you previously copied):iothub-explorer login "[iot hub connection string]" -
Create a new device identity called
myDeviceIdwith the command:
iothub-explorer create myDeviceId --connection-string
- Open a new shell or Node.js command prompt and navigate to the folder where you placed the sample files. Run the sample application using the following commands:
npm install
node simple_sample_device.js
- The sample application will send messages to your IoT Hub, and the iothub-explorer utility will display the messages as your IoT Hub receives them.
Prepare Your Development Environment
This document describes how to prepare your development environment to use the Microsoft Azure IoT SDK for Node.js.
Set Up Your Development Environment
Complete the following steps to set up your development environment:
- Installed Node.js.
- Ensure that the version of Node.js that you have installed is 0.12.x or later. If you do not know which version is installed, run
node --versionat the command line to check the version. - Clone azure-iot-sdks to your development machine or device. You should always use the master branch for the latest versions of the libraries and samples.
- Open the Node.js command prompt and navigate to the node folder in your local copy of this repository (azure-iot-sdks). Then, run the
build\dev-setup.cmdscript to prepare your development environment.
Set Up IoT Hub
Before you can communicate with your IoT Hub from a device you must create an IoT Hub instance in your Azure subscription and then you can obtain a provisional license from within your IoT Hub.
Create an IoT Hub
You can use the Azure Portal to create an IoT Hub to use with your devices.
1.Log in to the Azure Portal.
2.In the main menu navbar, click New, then click Internet of Things, and then click Azure IoT Hub.

3.In the New IoT Hub section, specify the desired configuration for the IoT Hub.
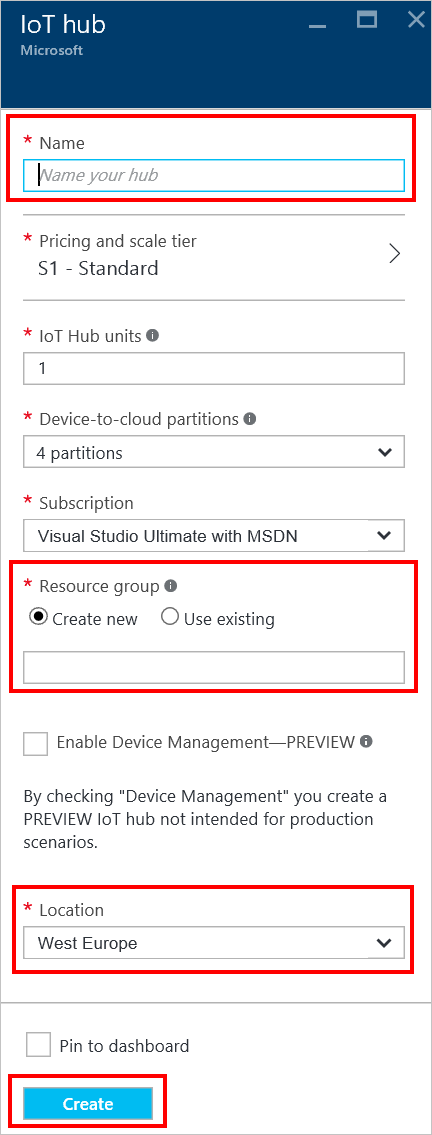
- In the Name box, enter a name to identify your IoT Hub. When the Name is validated, a green check mark will appear in the Name box.
- Change the Pricing and Scale Tier as desired. The getting started samples do not require a specific tier.
- In the Resource Group box, create a new resource group, or select and existing one. For more information, see Using resource groups to manage your Azure resources.
- Use Location to specify the geographic location in which to host your IoT Hub.
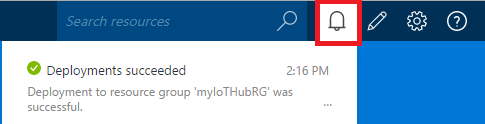
4.Once the new IoT Hub options are configured, click Create. It can take a few minutes for the IoT Hub to be created. To check the status, you can monitor the progress in the Start menu. Otherwise, you can monitor your progress from the Notifications section.
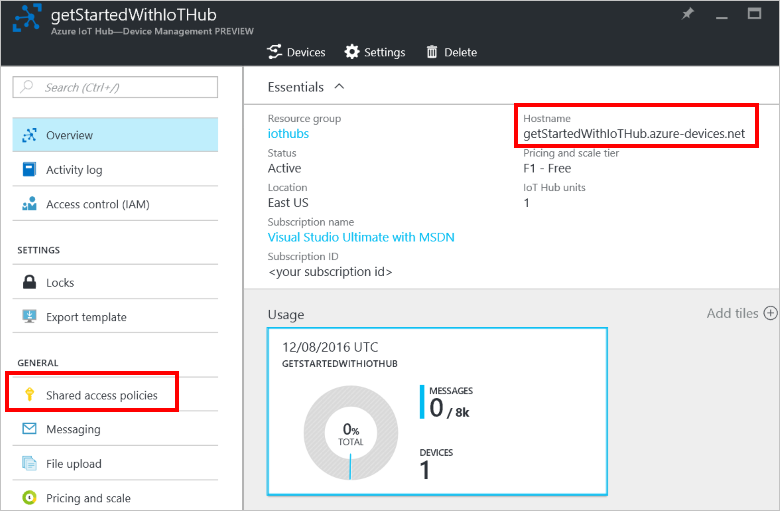
5.After the IoT hub has been created successfully, open the Overview section of the new IoT Hub and take note of the hostname URI. Then, click Shared access policies.
6.Select the Shared access policy oprtion called iothubowner, and then copy and take note of the connection string on the right-hand section.
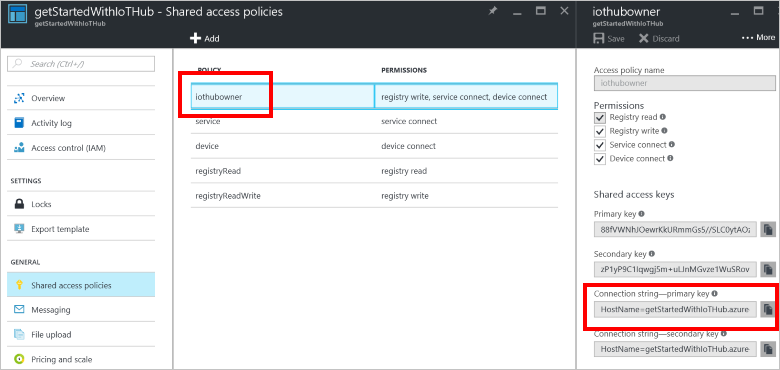
Your have now finished creating your IoT Hub, and you now have the connection string you need to use the iothub-explorer or the Device Explorer tool. This connection string enables applications to perform management operations on the IoT Hub, such as adding a new device to the IoT Hub.
Manage IoT Hub
Before a device can communicate with the IoT Hub, you must input device details to the IoT Hub device identity registry. When you add a device to your IoT Hub device identity registry, the hub generates the connection string that the device must use when it establishes its secure connection to your hub. You can also use the device identity registry to disable a device and prevent it from connecting to your hub. To add devices to your IoT Hub and manage those devices, you can use either:
- The cross-platform, command-line iothub-explorer tool
- The graphical Device Explorer tool
Use either of these tools to generate a device-specific connection string that you can copy and paste into the source code of the application running on your device. Both tools are available in this repository.
- Note: While IoT Hub supports multiple authentication methods for devices, both of these tools generate a pre-shared key to use for authentication.
- Note: You must have an IoT Hub running in Azure before you can obtain a provisional license for your device. The document Set up IoT Hub describes how to set up an IoT Hub.
You can also use both of these tools to monitor the messages that your device sends to an IoT Hub and send commands to your devices from the IoT Hub.
Use the iothub-explorer Tool to Obtain a Provisional License for a Device
The iothub-explorer tool is a cross-platform, command-line tool (written in Node.js) for managing your devices in an IoT Hub. You will need to install Node.js for your platform, including the npm package manager from nodejs.org To install this tool into your environment, run the following command in a terminal/shell window on your machine: npm install -g iothub-explorer See Install iothub-explorer for more information. To obtain a provisional license for a new device:
-
Get the connection string for your IoT Hub. See Set Up IoT Hub for more details.
-
Run the following command to register your device with your IoT hub. When you run the command, replace
[iothub connection string]with the IoT Hub connection string from the previous step and replacemyDeviceIdwith a name for your device, such as mydevice.
iothub-explorer login "[iothub connection string]"
iothub-explorer create myDeviceId --connection-string
You should see a response like this: Created device mydevice - ... - connectionString: HostName=<hostname>;DeviceId=mydevice;SharedAccessKey=<device-key> Copy the device connection string information for later use. The samples in this repository use connection strings in the format: HostName=<iothub-name>.azure-devices.net;DeviceId=<device-name>;SharedAccessKey=<device-key>. To get help on using the iothub-explorer tool to perform other tasks such as listing devices, deleting devices, and sending commands to devices, enter the following command: iothub-explorer --help For further information about using the iothub-explorer tool to perform tasks such as disabling a device, monitoring a device, and sending commands to a device, see: