Operating System
Android
In this chapter, we will show the steps to install Android x86 OS on LattePanda 3 Delta using a virtual machine.
Preperations
- 💿 Android x86 OS Disc Image File
- Virtualization Software, such as VMware, VirtualBox
Installation Steps
- Download the ISO mirror image file for Android x86.
You may download the latest version of the mirror image file from the official website of Android x86.Download android-x86_64-9.0-r2.
- Install virtualization software.
You may utilize VMware, VirtualBox, or other virtualization software. For this instance, we will be utilizing VMware Player as the virtualization software. Download VMware Player.
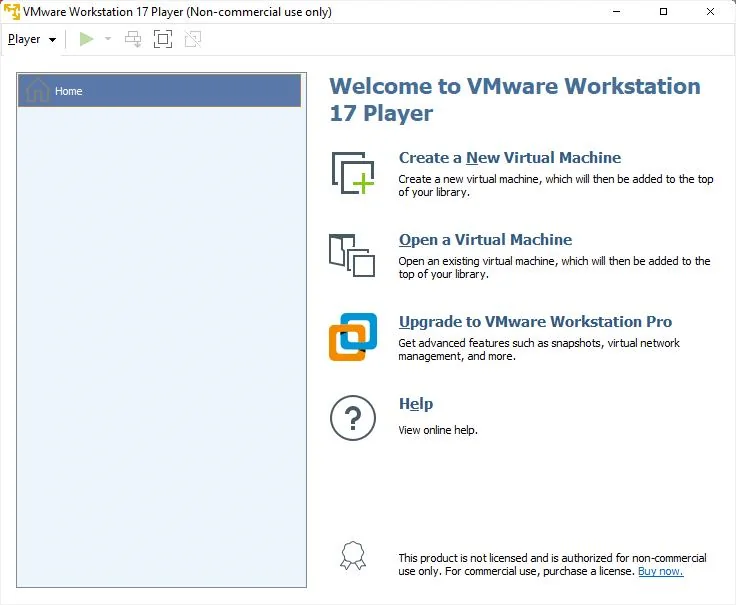
- Establish a virtual machine.
Commence VMware Player and select
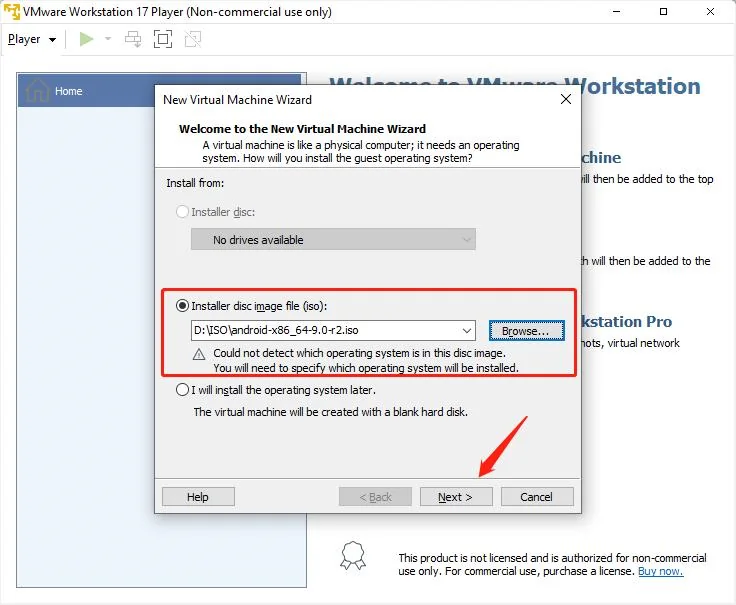
Create a new virtual machine.After clicking on
Browsefor the installation program disc image file, select the above-mentioned downloaded mirror image file, and then click onNext.Select
Linuxfor the operating system, and then chooseOther Linux 5.X Kernel 64-bitas the version, and finally, click onNext.
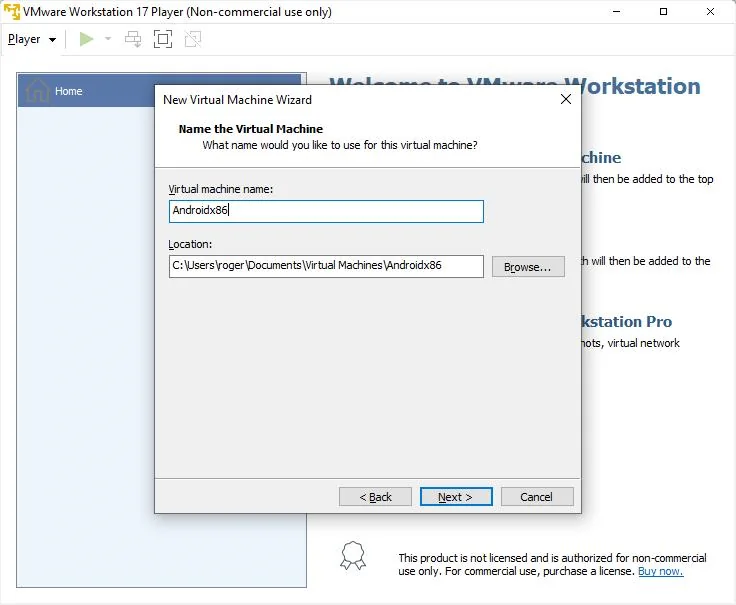
Name the virtual machine and select the physical location for storing the virtual machine, then click on
Next.
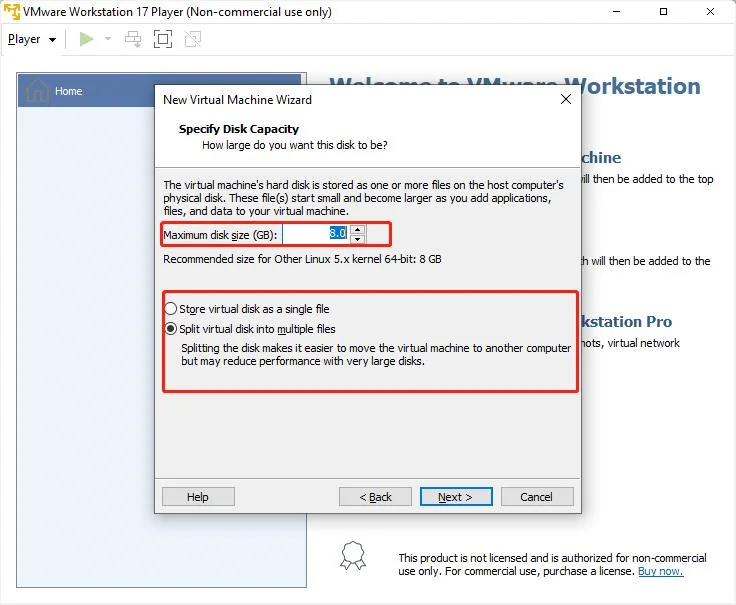
Choose a disk size of 8GB, and then split the virtual disk into multiple files before clicking on
Next.
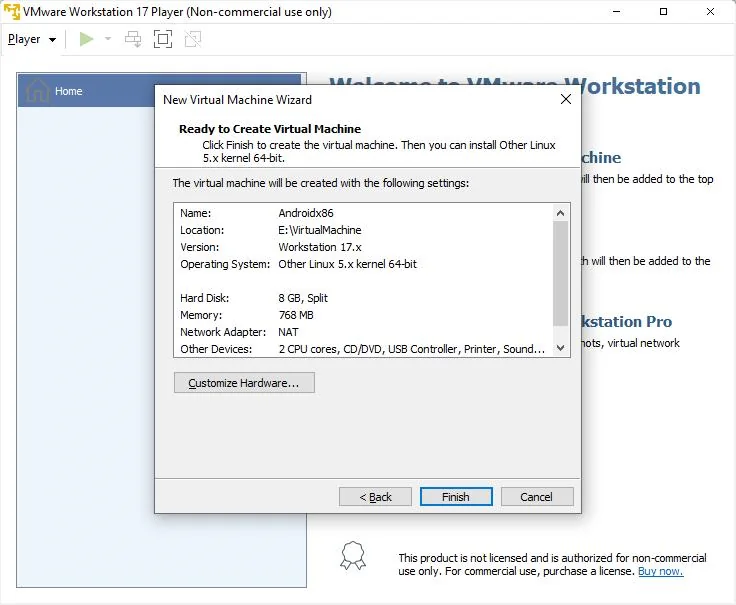
Confirm the virtual machine information and click on
Finish.
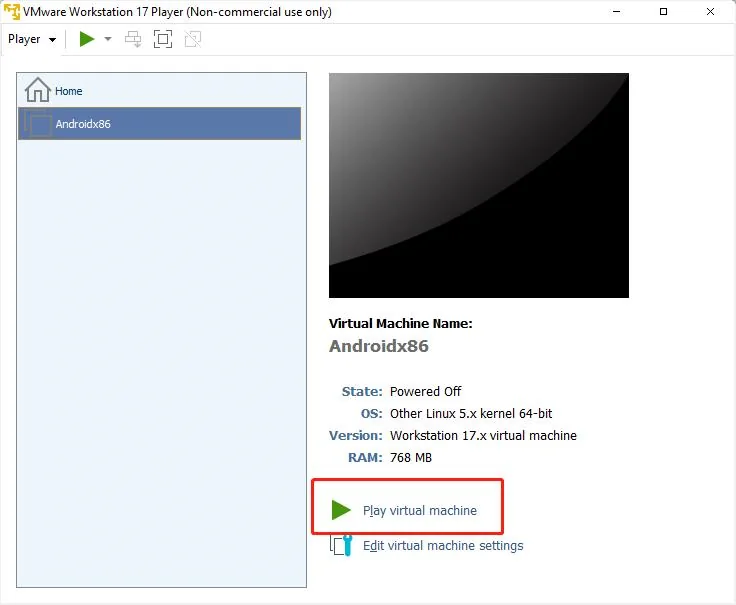
Click on
Playto start the virtual machine.
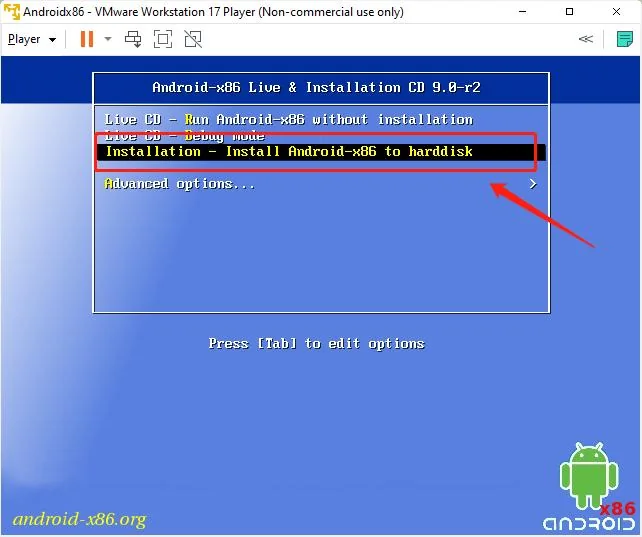
Installing Android onto a virtual machine.
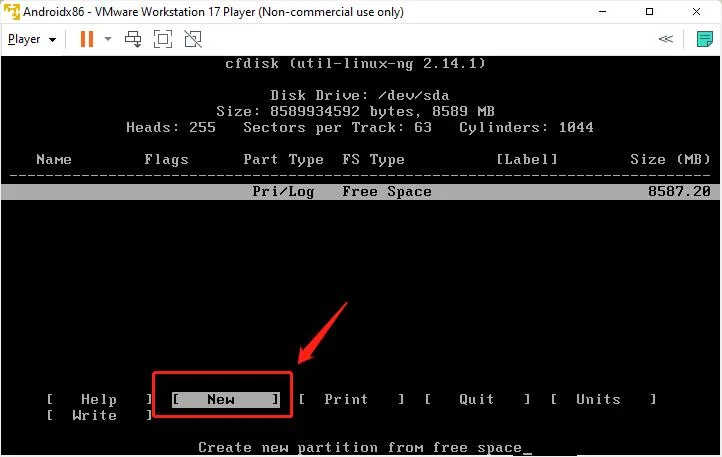
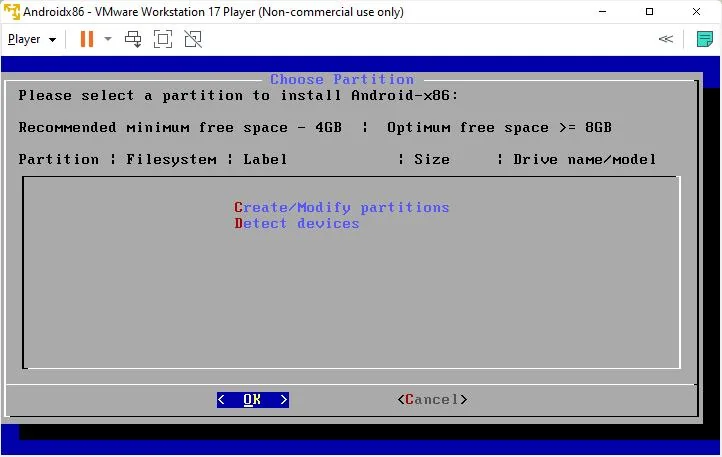
Press C on the keyboard, select
Create/Modify partitionsusing the arrow keys, and then clickOK.
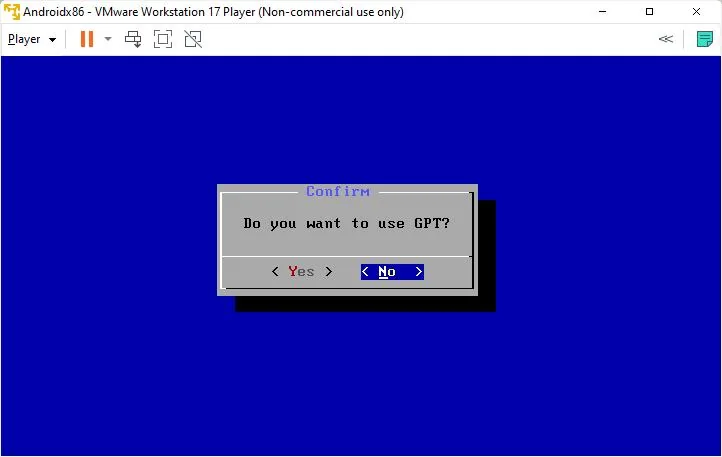
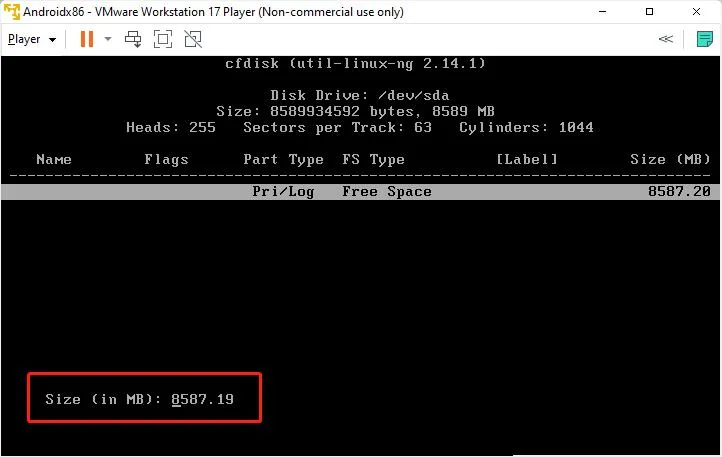
Choose not to use GPT.
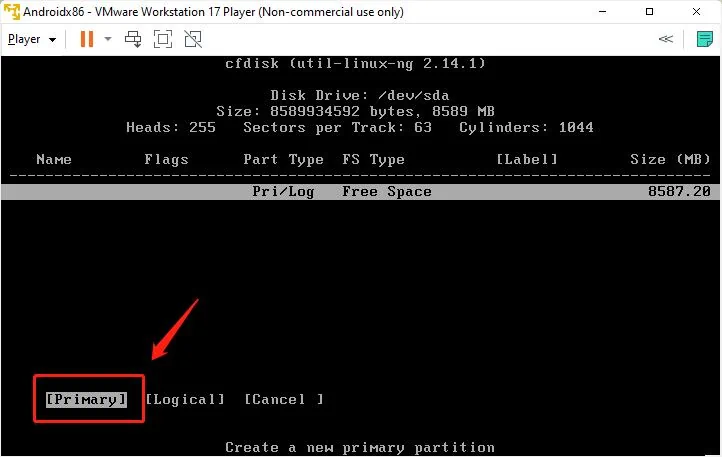
Select
NEW, thenPrimary. Confirm the amount of available disk space, and press Enter.
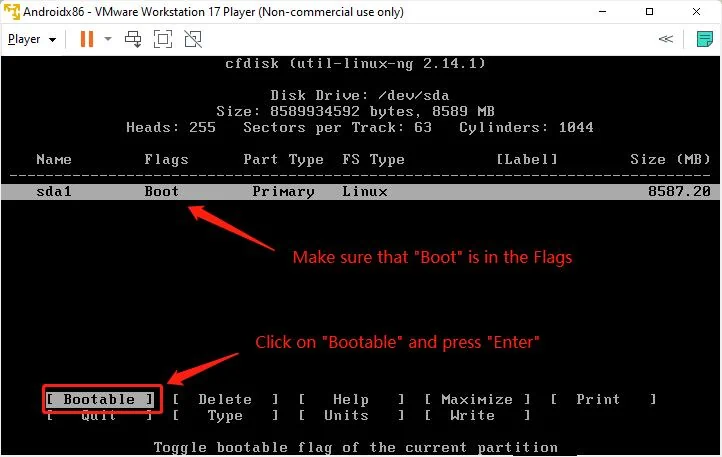
Click on
Bootableand press Enter, ensuring that theBootableoption is present in the Flags.
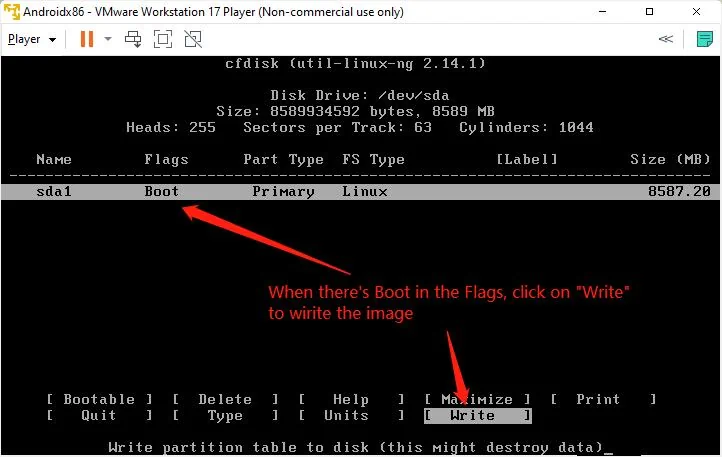
Click on
Writeto write the image.
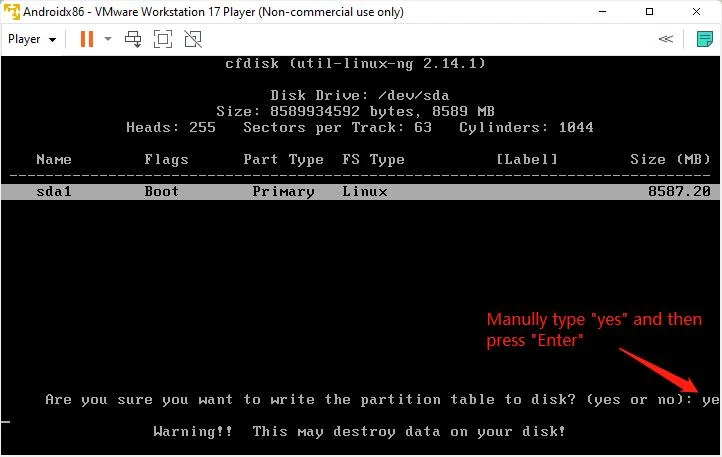
Manually type
Yesand press Enter.
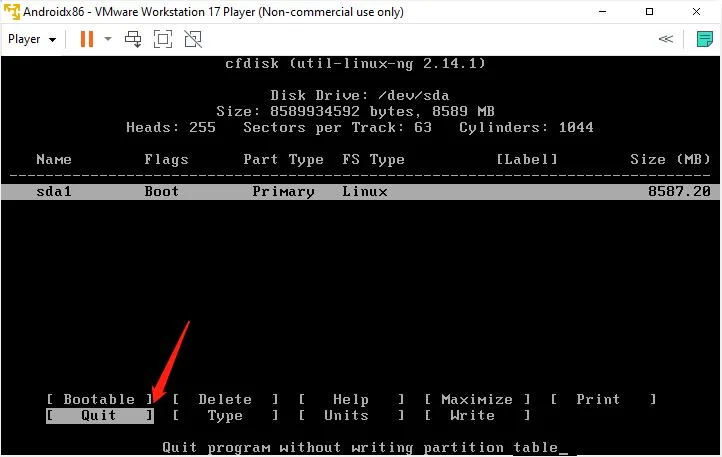
After waiting for the image to be written, select
Quitand press Enter.
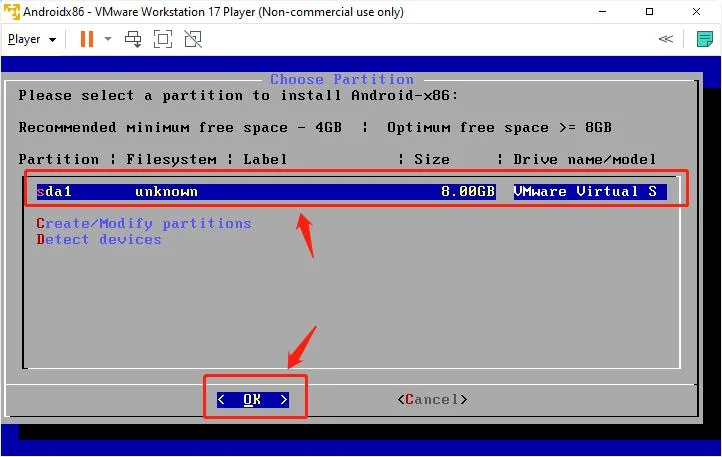
Select the hard disk that was just written to, and click
OKto confirm.
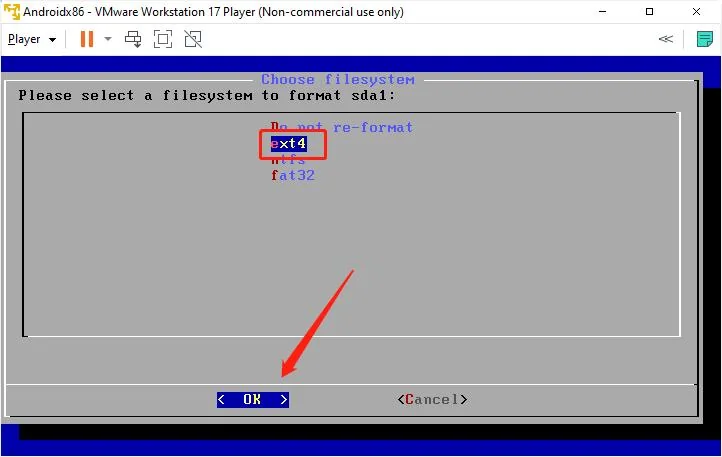
Select the EXT4 file system, and press Enter to confirm.
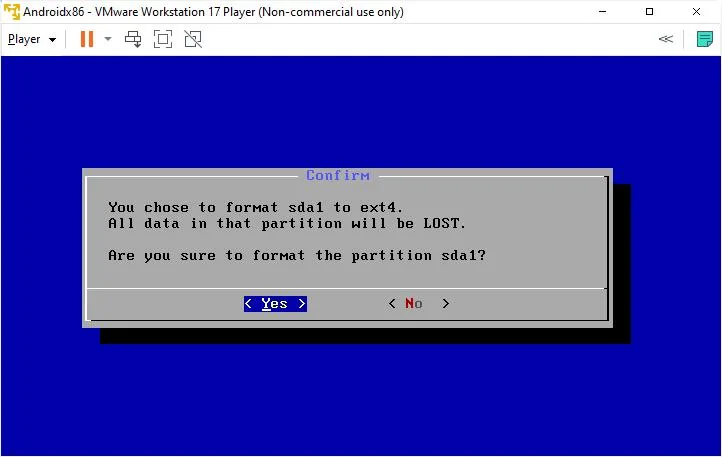
Select
Yesto format the hard disk in EXT4 format.
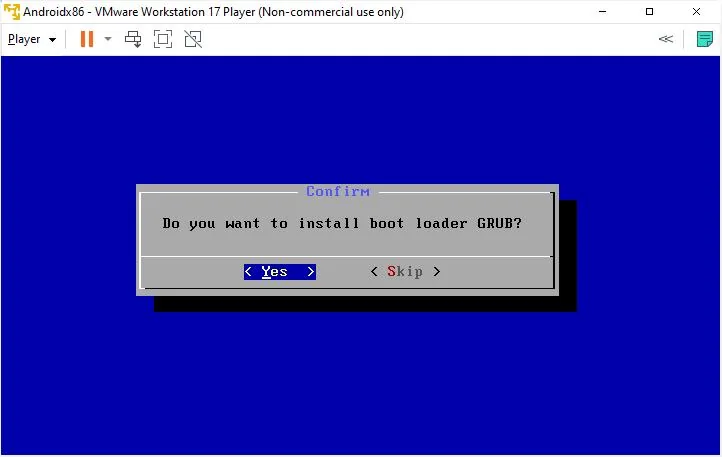
Select
Yesto install the GRUB bootloader.
Press C on the keyboard, select
Create/Modify partitionsusing the arrow keys, and then clickOK.
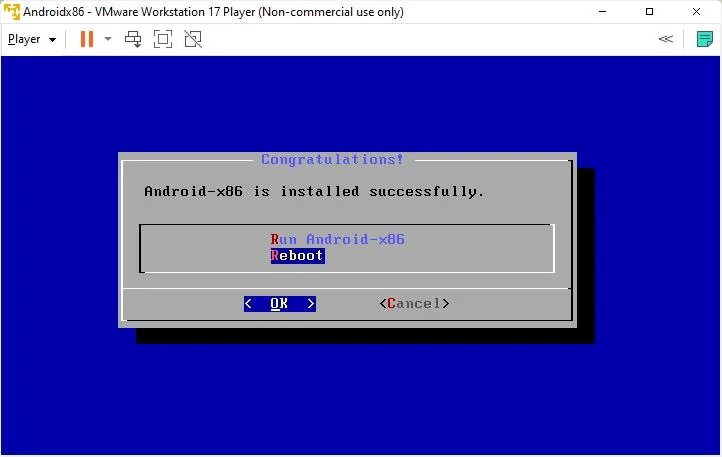
Select
REBOOTand thenOK, to complete the installation of Android onto the virtual machine.

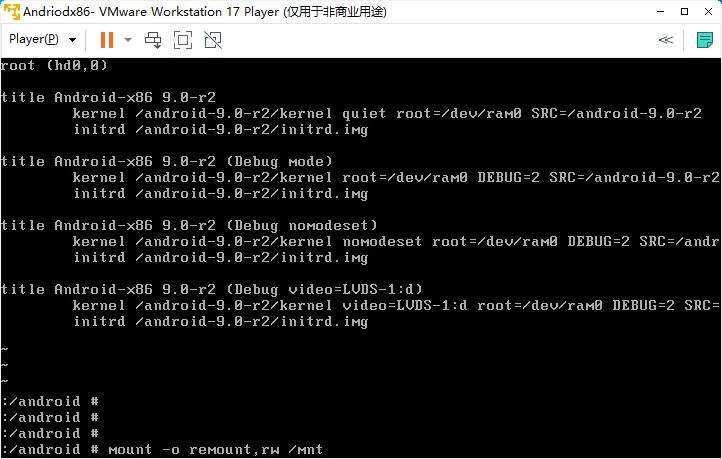
- Modify the disabled graphics card driver.
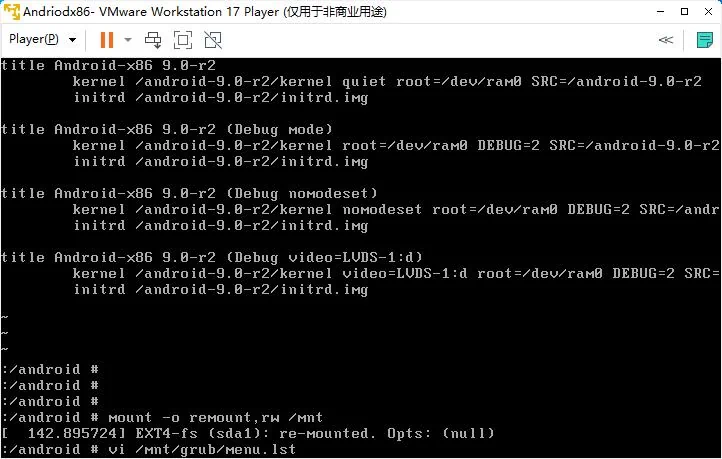
Select the second "debug" mode to enter the system.
Enter "mount -o remount,rw /mnt" to modify the corresponding file's read and write permissions.
Enter
vi /mnt/grub/menu.lstto edit the corresponding file using the vi editor.
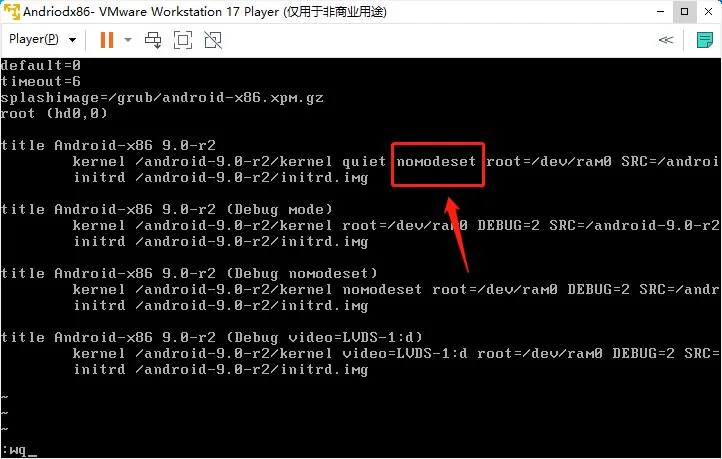
Press I to enter the edit mode in the vi editor. Add
nomodesetafterquietto disable the graphics card driver. Then, type:wqto save and exit the vi editor.
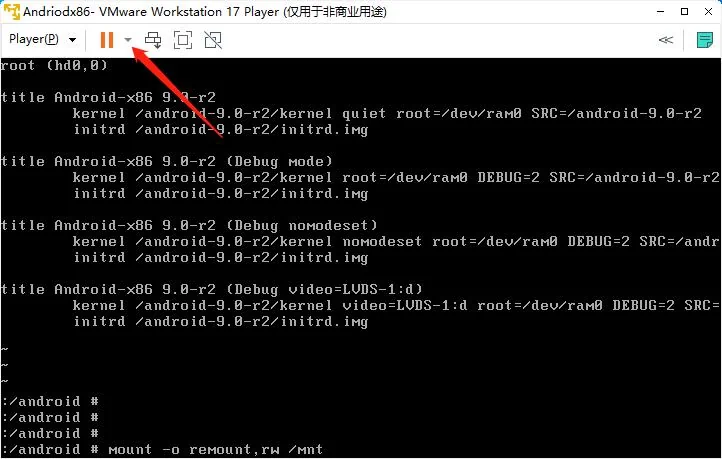
Click on "Restart" to select and initiate a reboot.

After completing the above steps, restart the virtual machine and select "Android x86". You can now begin using the Android x86 system.

In summary, the Android x86 virtual machine is a convenient way for users to experience the Android operating system on a Lattepanda. Users only need to follow the above steps to install and use it.
Note
- Android x86 is designed for PC, not for mobile phones or tablets, so its user interface and operation may be slightly different from the Android system you use on mobile devices.