Operating Systems
Windows Recovery Image
![]()
The following guide demonstrates how to use the Windows 11 recovery image file, which is the Windows 11 image pre-installed on the LattePanda Iota from the factory. This image comes with all hardware drivers and is ready to use, providing you with a fast and ultimate experience.
This image does not update in real-time. Therefore, if you need to install the latest version of the Windows OS, you will need to download it yourself and install the drivers.
The Operating system will be installed on the eMMC by default.
How to install the official system image to the SSD?
- Insert your SSD into LattePanda Iota via M.2 M-Key Expansion Board(DFR1250), then remove all other storage.
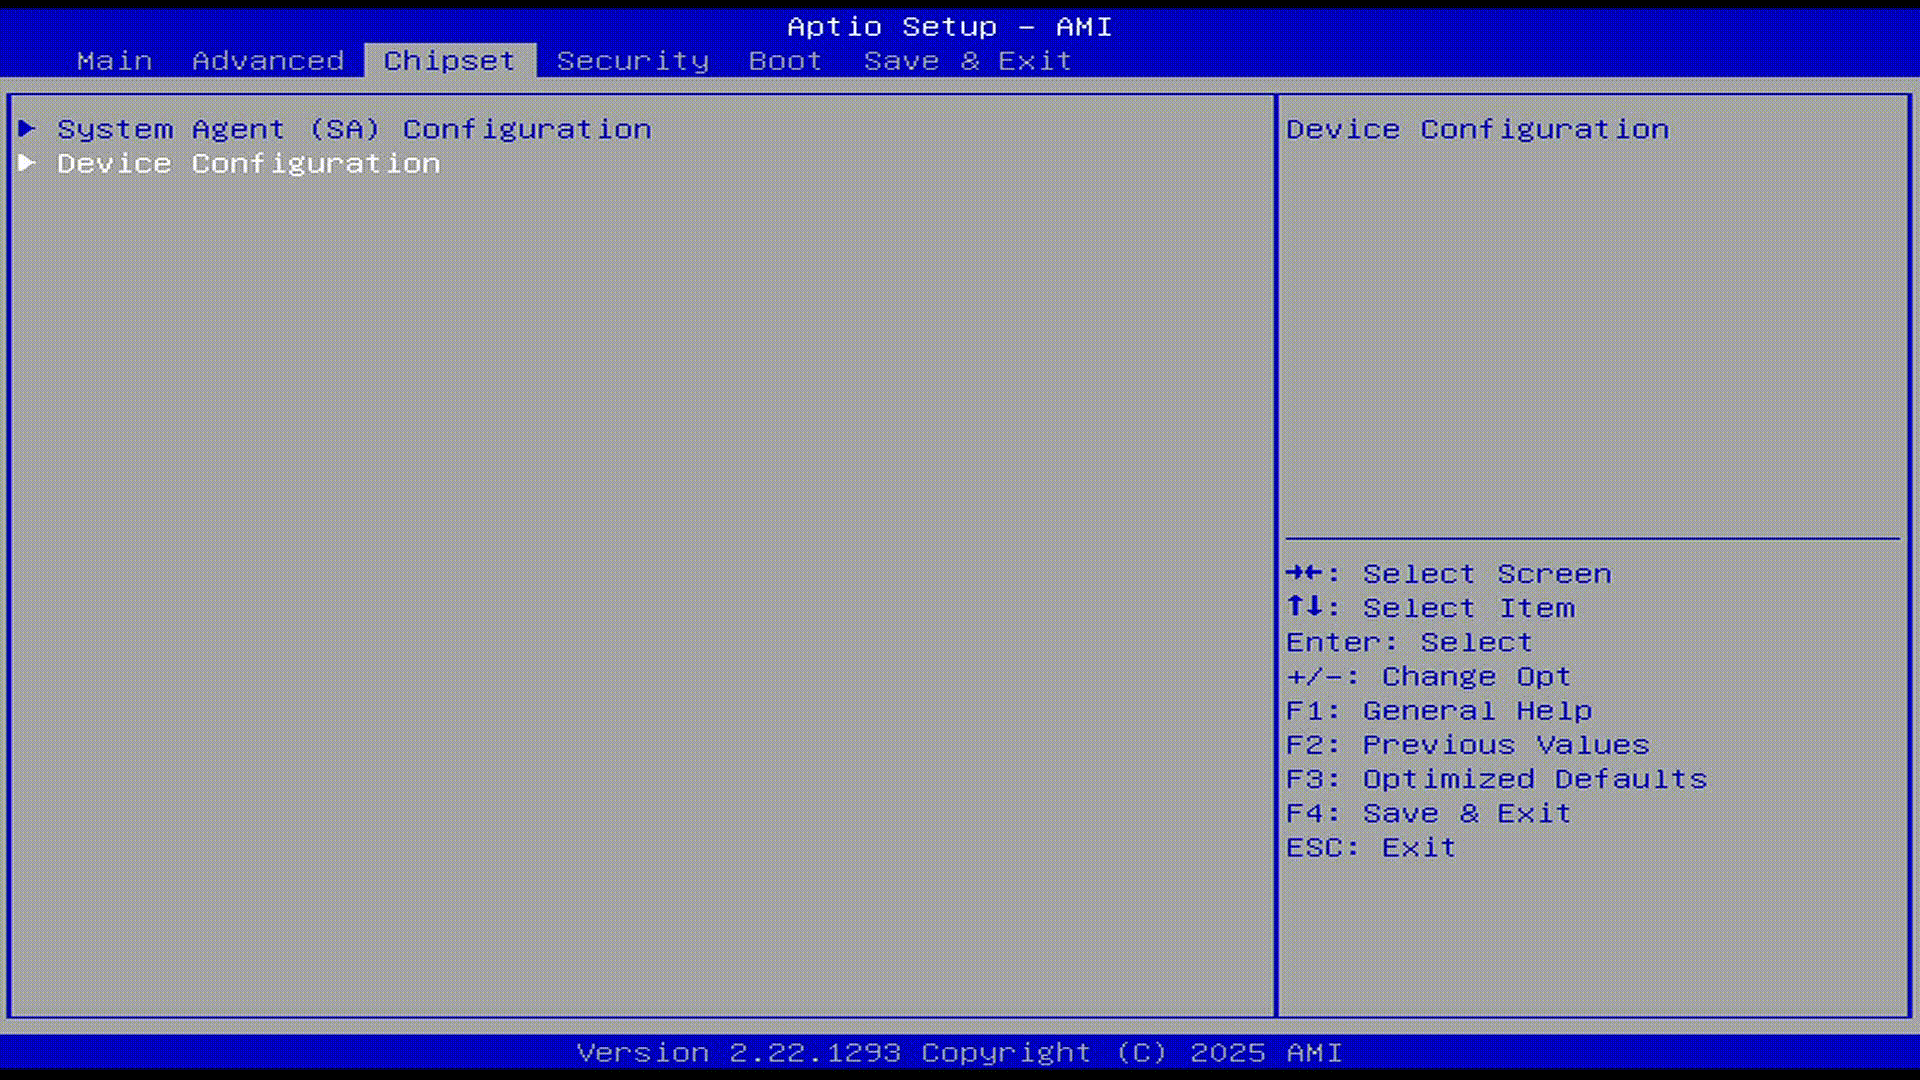
- Enter into the BIOS setup(Chipset -> Device Configuration ->eMMC 5.1 Controller) to disable the onboard eMMC. Then save the change.
- Restart the LattePanda. Use the following installation steps to install the system image.
🧰 Preparations
- USB flash drive (8GB or larger, formatted as NTFS)
-
💿 Official Windows 11 System Image for LattePanda Iota:
Download from Dropbox or Google Drive
Note
- Installation steps are identical for Windows 10 and Windows 11.
- The official system image provided by the LattePanda team includes all necessary drivers pre-installed, ensuring optimal performance and plug-and-play experience out of the box.
⚙️ Installation Steps
- Download the Windows 11 system image file for LattePanda Iota.
- Format your USB drive to NTFS file system.
- Extract the downloaded
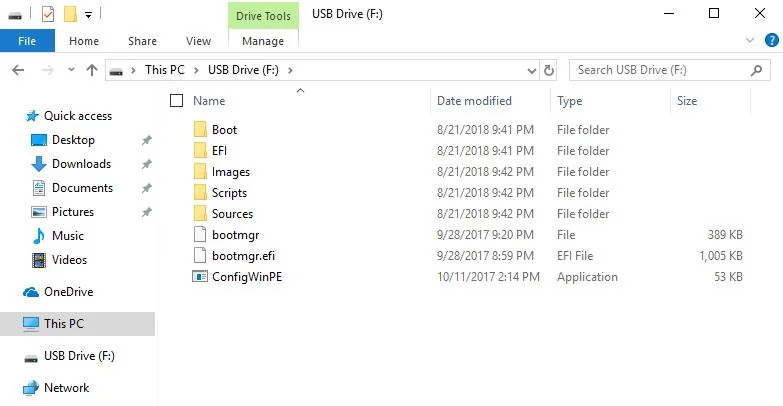
.zipfile and copy all contents directly to the root of your USB drive.
→ The file structure should match the example below:
- Insert the prepared USB drive into your LattePanda Iota and power it on.
💡 If you prepared the USB on the Iota itself, please restart the board before proceeding.
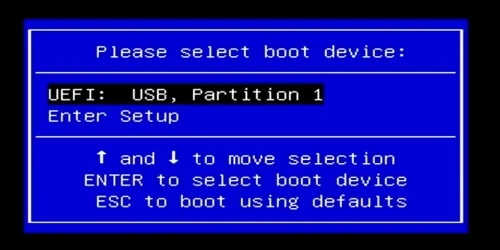
- Immediately and repeatedly press the F7 key to enter the Boot Device Selection Menu.
- Use Up / Down to highlight your USB drive, then press Enter.
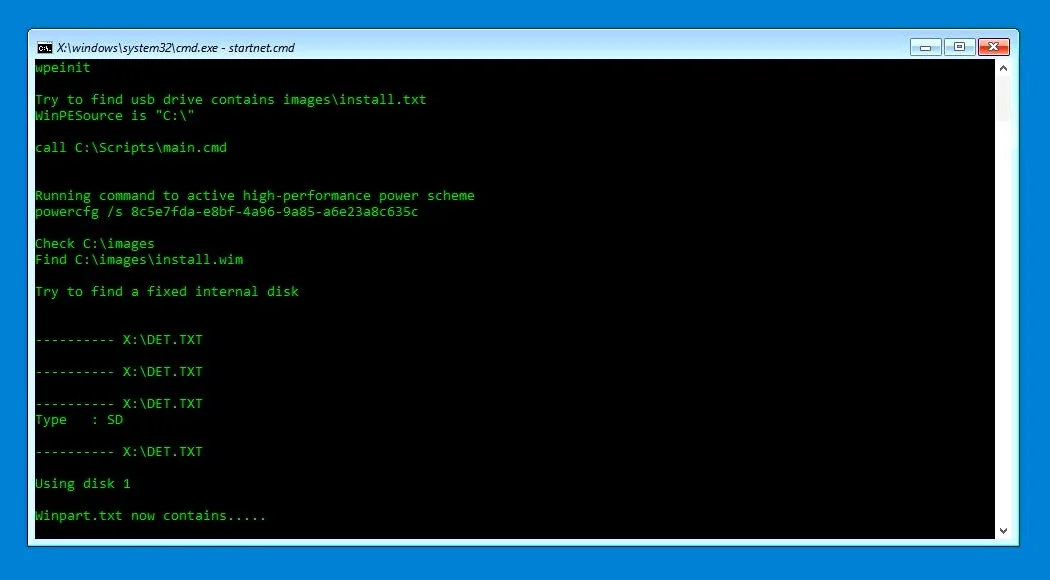
- The automated installer will launch — no input required. Please wait 5–8 minutes for completion.
-
When you see the “Installation Completed” message, shut down the board and remove the USB drive.
-
Power on the LattePanda Iota. The system will initialize for approximately 3 minutes, then boot into the Windows desktop.
→ Enjoy your new LattePanda Iota!
🔑 Windows Activation
If you purchased an activated model, a Windows license sticker is included in the box:
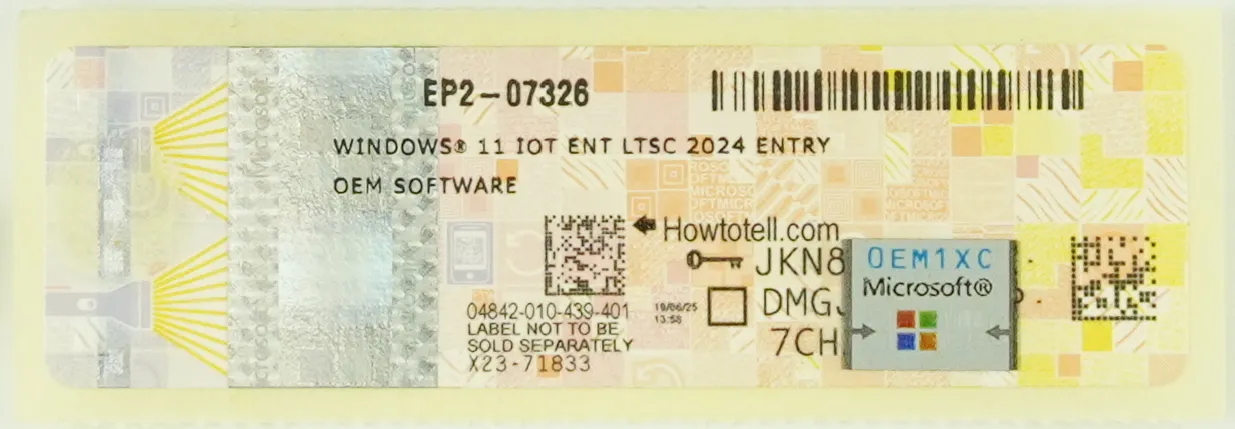
Follow these 6 steps to activate Windows:
- Gently scrape off the silver coating to reveal your full 25-character Product Key.
- Ensure your Iota is connected to the internet (via Wi-Fi or Ethernet).
- Right-click the Start button → Select System.
- Click Activate Windows.
- Click Change Product Key.
- Enter the key → Click Next → Activation will complete automatically.
Standard Windows Installation
Lattepanda Iota runs a full version of the Windows OS, which means that the installation process is the same as on a regular laptop or desktop computer. The general steps are as follows:
-
Search for and download the version of Windows you need.
You can download from Microsoft Software Download Center.
-
Burn the Windows image into a USB drive. You can use the Rufus for this purpose.
-
Plug the USB drive into the LattePanda, and continuously press Del after turning it on to enter the BIOS settings. Configure the LattePanda to boot from the USB drive.
-
Follow the on-screen instructions to complete the operating system installation.
-
Refer to the drivers section and complete the installation of all necessary drivers.