RP2040 Programming
The LattePanda Iota integrates a RP2040 MCU, which communicate with Intel N150 processor via USB 2.0.
-
Dual ARM Cortex-M0+ @ 133MHz
-
264kB on-chip SRAM
- 8MB onboard Flash
- 3.3V I/O Level
3.3V I/O Level Limit
The RP2040 operates at a 3.3V logic level. Its I/O pins are not 5V tolerant. Do not connect 5V devices directly to the GPIOs.
RP2040 GPIO Mapping
Most of the RP2040's GPIOs are routed out through the header, as shown in the figure below.
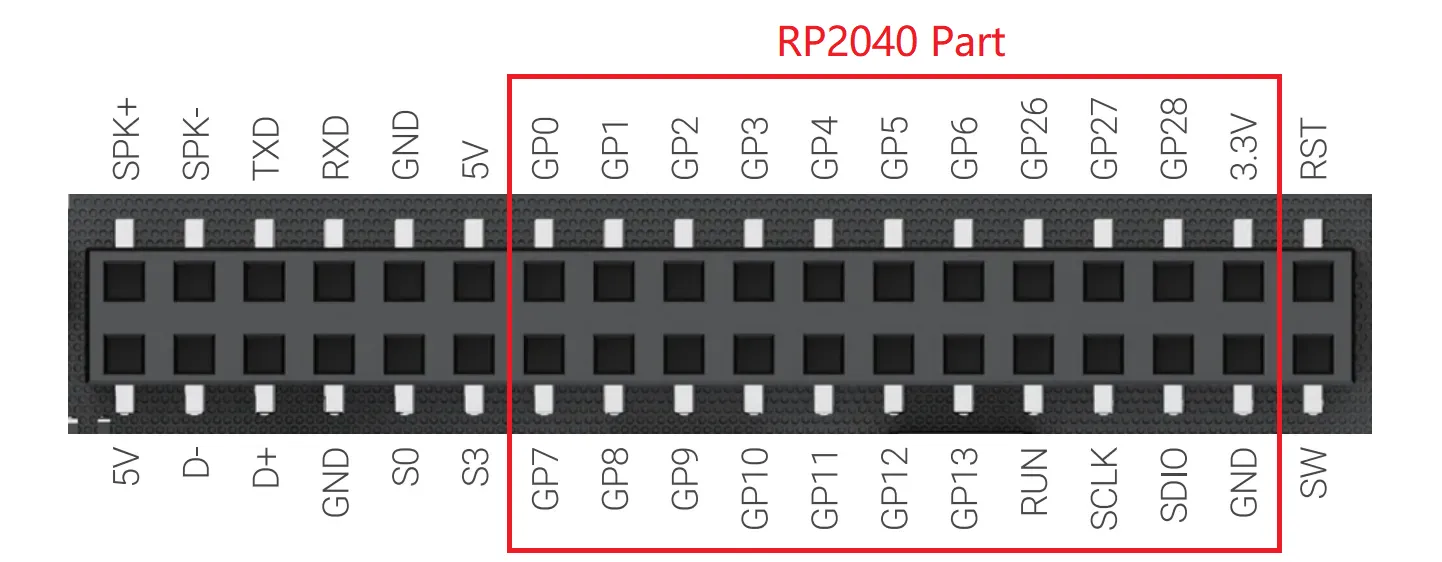
| RP2040 Pin | Board Connection / Function | Notes |
|---|---|---|
| GPIO0 ~ 13 | Header Pin GP0 ~ GP13 | |
| GPIO14 ~ 17 | Not Connected | Internally Floating |
| GPIO18 | S0 | Internally Connected to S0 State Pin |
| GPIO19 | S3 | Internally Connected to S3 State Pin |
| GPIO20 | SW | Internally Connected to SW Button |
| GPIO21 | RST | Internally Connected to RST Button |
| GPIO22 ~ 24 | Not Connected | Internally Floating |
| GPIO25 | Onboard Blue LED | Internally Connected to Blue LED |
| GPIO26 ~ 28 | Header Pin GP26 ~ GP28 | Multiplexing Function: ADC each pin in parallel with a 100nF capacitor |
| GPIO29 | Not Connected | Internally Floating |
| SWCLK | Header Pin SCLK | |
| SWDIO | Header Pin SDIO | |
| RUN | Header Pin RUN | RP2040 Reset Pin |
| IOVDD/DVDD | Header Pin 3.3V | RP2040 Power Supply |
Note
GPIO26 to GPIO28 of the RP2040 can be muxed as ADC input. To ensure stable ADC sampling values, these pins are paralleled with 100nF capacitors, which can affect rapidly changing signals such as I2C. If using I2C, please avoid these three GPIO pins and choose alternative GPIO pins instead.
Uploading new Firmware to RP2040
The RP2040 features a built-in USB bootloader, a small program stored in its Read-Only Memory (ROM). This bootloader allows you to upload new firmware to the microcontroller simply by connecting it to your computer via USB.
Onboard Buttons
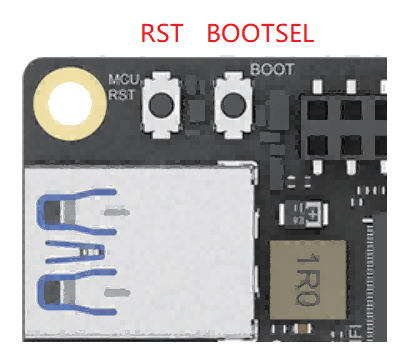
On the LattePanda Iota board, there are two buttons that control the operating status of the RP2040, which are:
- RST: The Reset button. A short press performs a hard reset on the RP2040, restarting its current program.
- BOOTSEL: The Boot select button. This button is used to put the RP2040 into its special bootloader mode, preparing it to receive new firmware.
Upload Instructions
Follow these steps to upload a .uf2 file to the RP2040:
- Press and hold the
BOOTSELbutton. - While still holding
BOOTSELbutton, press and release theRSTbutton. - Release the
BOOTSELbutton. - Your board's OS will now detect the RP2040 as a new USB Mass Storage Device (like a flash drive). It will typically appear with the name RPI-RP2.
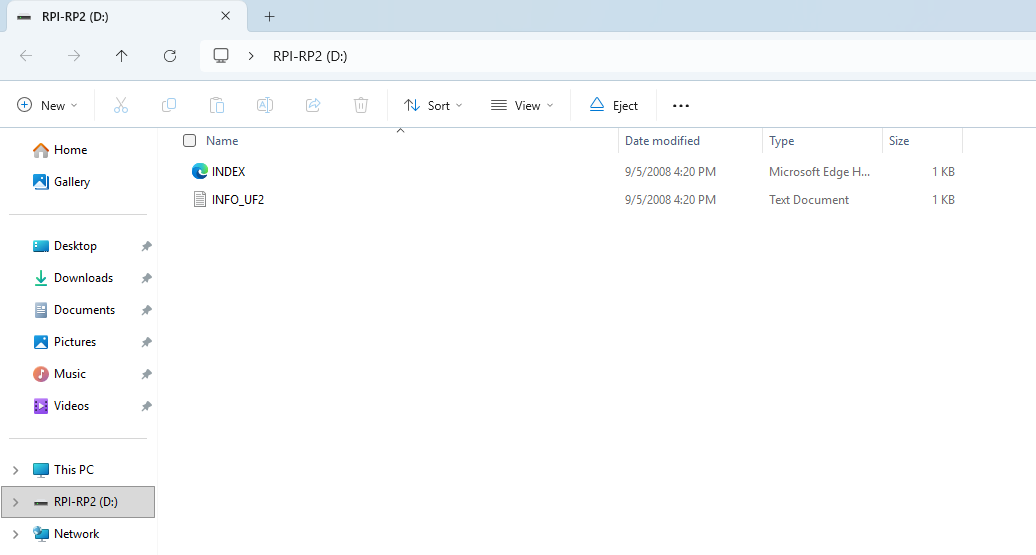
- Drag and drop your firmware file (.uf2) onto this new drive.
- Once the file is copied, the bootloader will automatically verify the firmware, write it to the RP2040's flash memory, and then reboot the device. Your new program will start running immediately.
RP2040 Power Control
LattePanda Iota allows control of RP2040 power supply through BIOS settings and DIP switches: you can flexibly configure whether the RP2040 remains powered and running in different states such as when the LattePanda board is powered but not booted, during system operation, in sleep mode, after hibernation, and after shutdown, thereby adapting to various application scenarios.
Please refer to the BIOS MCU Power Control section for details.