RP2040 Programming - Arduino C++
Preparation
Arduino C++ provides a simple and intuitive framework for programming microcontrollers. This section guides you through setting up the Arduino IDE to program the RP2040.
Follow these steps to set up your development environment:
- Install the Arduino IDE.
Download and install the Arduino IDE from the official Arduino website.
- Add RP2040 board support to Arduino IDE.
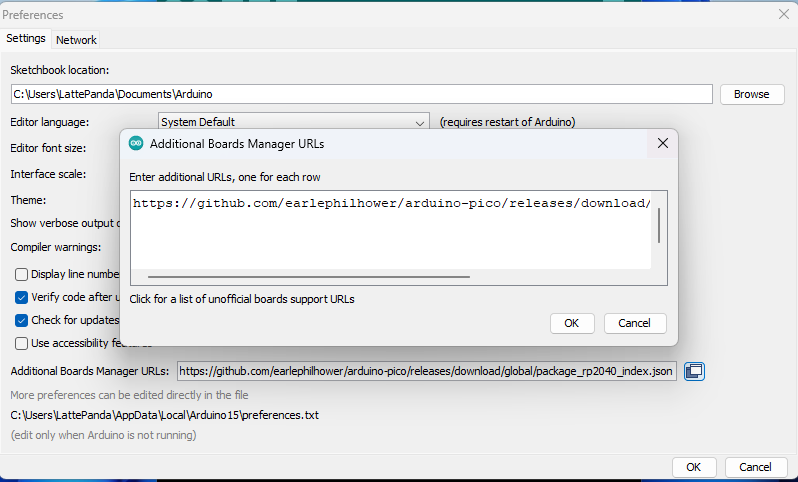
Open Arduino IDE, navigate to: File → Preferences.
In the "Additional Boards Manager URLs" field, add the following URL:
https://github.com/earlephilhower/arduino-pico/releases/download/global/package_rp2040_index.jsonClick OK to save the settings.
- Install the RP2040 package.
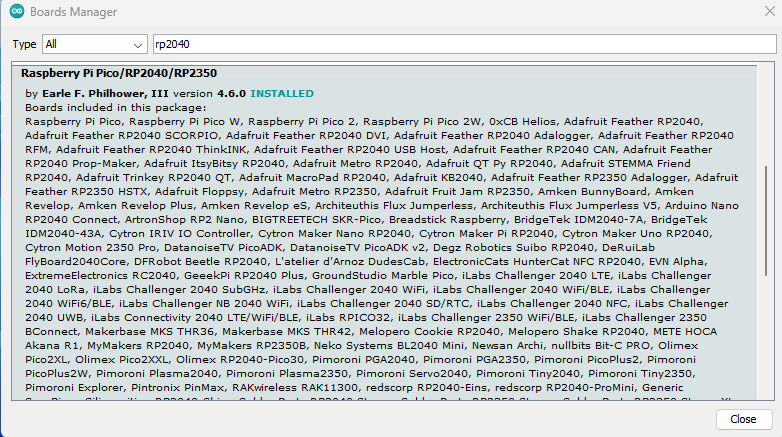
Navigate to: Tools → Board → Boards Manager.
Search for "pico" or "rp2040" in the search box.
Find "Raspberry Pi Pico/RP2040" by Earle F. Philhower, III , then click Install.
Wait for the installation to complete. The download process may take time, depending on your network speed.
- Select the board.
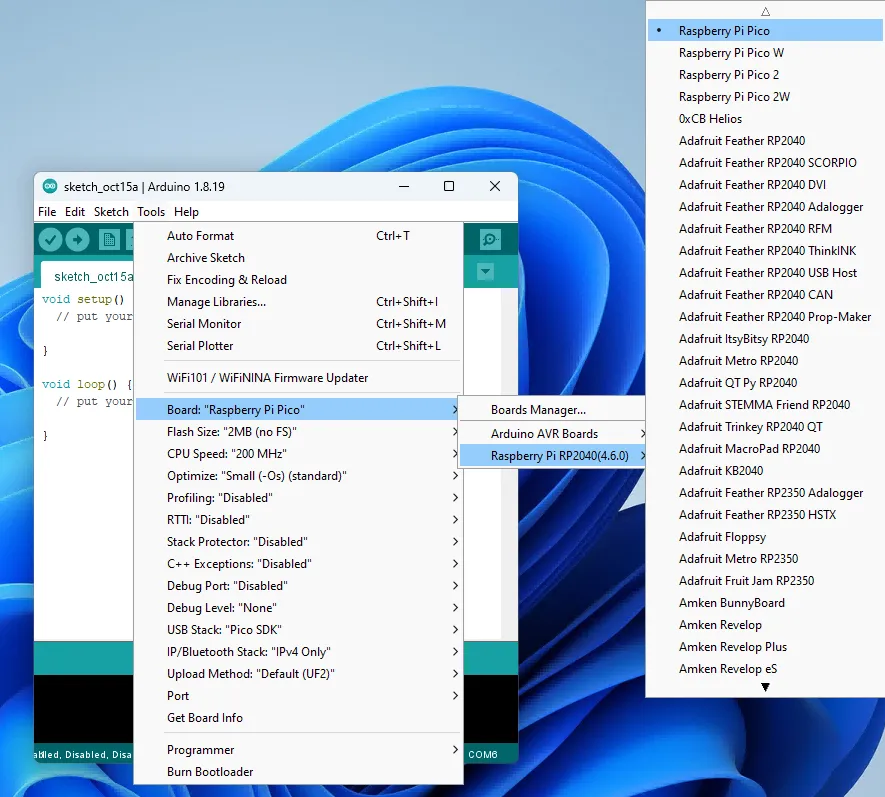
After installation, navigate to: Tools → Board → Raspberry Pi RP2040 Boards → Select Raspberry Pi Pico.
Upload the First Sketch
For the first upload, you must manually put the RP2040 into bootloader mode. This section uses the built-in "Blink" example to demonstrate the process.
-
Open the Arduino IDE.
-
In the Arduino IDE, navigate to File → Examples → Basics → Blink.
-
Verify that the
Raspberry Pi Picoboard is selected. -
Enter bootloader mode.
Press and hold the
BOOTSELbutton, then press and release theRSTbutton. Finally release theBOOTSELbutton. The OS will now detect the RP2040 as a new USB Mass Storage Device (like a flash drive). It will typically appear with the name RPI-RP2.
- Select the upload port.
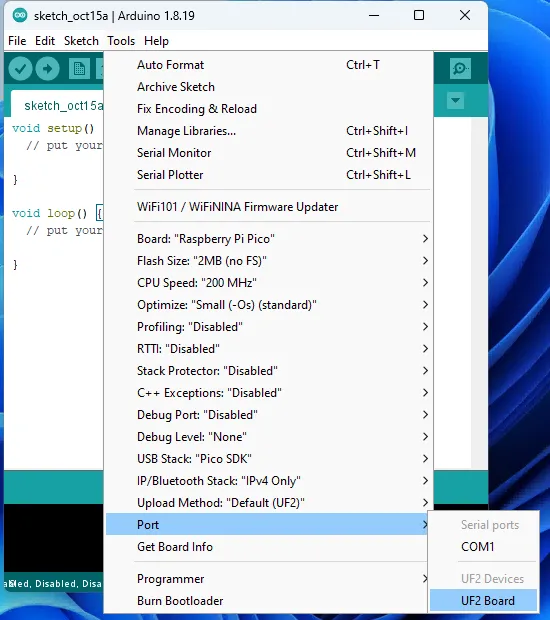
Navigate to: Tools → Port → Select
UF2 Board. After the first upload, this is not necessary as the arduino-pico core has auto-reset support. Select the appropriate serial port shown in the Arduino Tools->Port->Serial Port menu once.
-
Click the Upload button to upload the code to the RP2040.
Wait for the upload process to complete. You should see "Done uploading" in the status bar.
-
The blue LED on the top of the Iota board will begin flashing on and off at 1-second intervals.
Upload Subsequent Sketches
After the first upload, the arduino-pico core enables an auto-reset feature, which simplifies future uploads. You no longer need to enter bootloader mode manually.
- Select the Serial Port
Connect your board. Navigate to Tools → Port and select the serial port corresponding to your RP2040 (e.g.,
COM3or/dev/ttyACM0).

- Upload your code
With your new sketch open, simply click the
Uploadbutton. The Arduino IDE will automatically handle the reset and upload process.
Language Reference
Arduino C++ Language Reference
Arduino-Pico Core Documentation