BIOS Setup
Entering BIOS Setting
-
Power on or reboot LattePanda.
-
Press Del key continuously to enter into BIOS menu before you see the LattePanda logo on the splash screen.

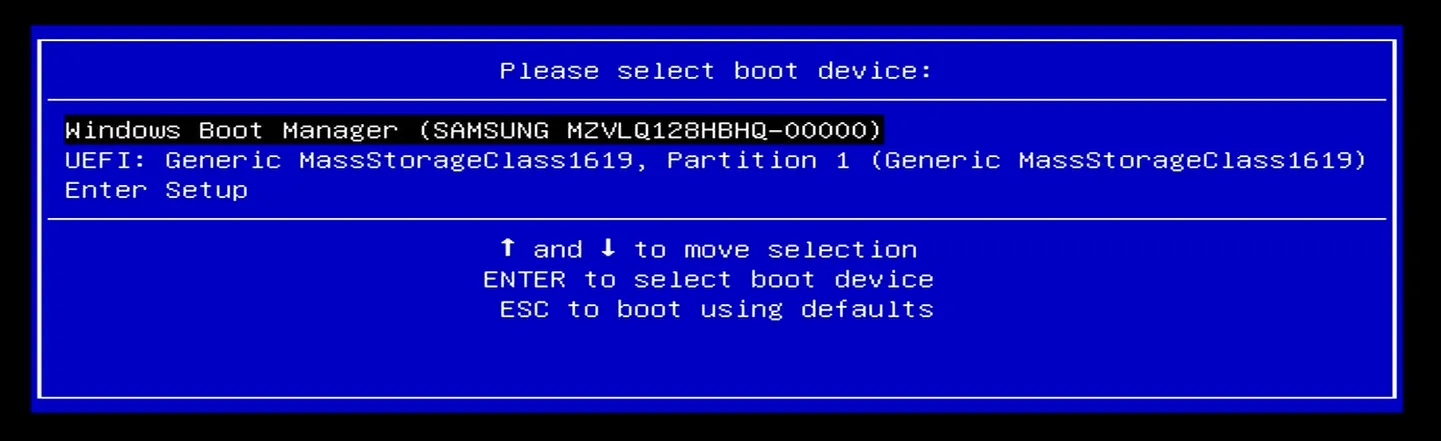
Select Bootable Device
-
Power on or reboot LattePanda.
-
Press the F7 key continuously before the bootable devices appear on the screen during the boot process.
-
Press Up or Down key to select the bootable device, and press Enter key to boot from it.
Adjusting TDP Setting
The LattePanda Mu Ultra is a versatile compute module that features a configurable TDP (Thermal Design Power) ranging from 8W to 37W. This allows users to optimize the balance between power consumption and computational performance based on specific requirements.
To adjust the TDP, you can modify the PL1 (Power Limit 1) and PL2 (Power Limit 2) values in the BIOS.
Understanding PL1 and PL2
- PL1 (Power Limit 1): The long-term power limit. This defines the sustained power consumption the processor maintains under continuous load.
- PL2 (Power Limit 2): The short-term burst power limit. It allows the processor to exceed PL1 for a brief period to handle instantaneous spikes in workload before scaling back to the PL1 level to manage thermals.
TDP Value Limit
- According to the TDP parameters provided by Intel, the
PL1andPL2value must not be lower than8W. Otherwise, it will cause the processor to operate at its minimum frequency, severely impacting performance. - For long-term full-load operation, it is recommended that the
PL1value does not exceed30W(default value).
Configuration Steps
-
After entering the BIOS setup, navigate to the following path:
Advanced -> CPU Configuration -> Power Limit 1 / 2 -
Set the Power Limit 1 and Power Limit 2. The unit for both values is milliwatts.
Default Value:
Power Limit 1: 30000; Power Limit 2: 37000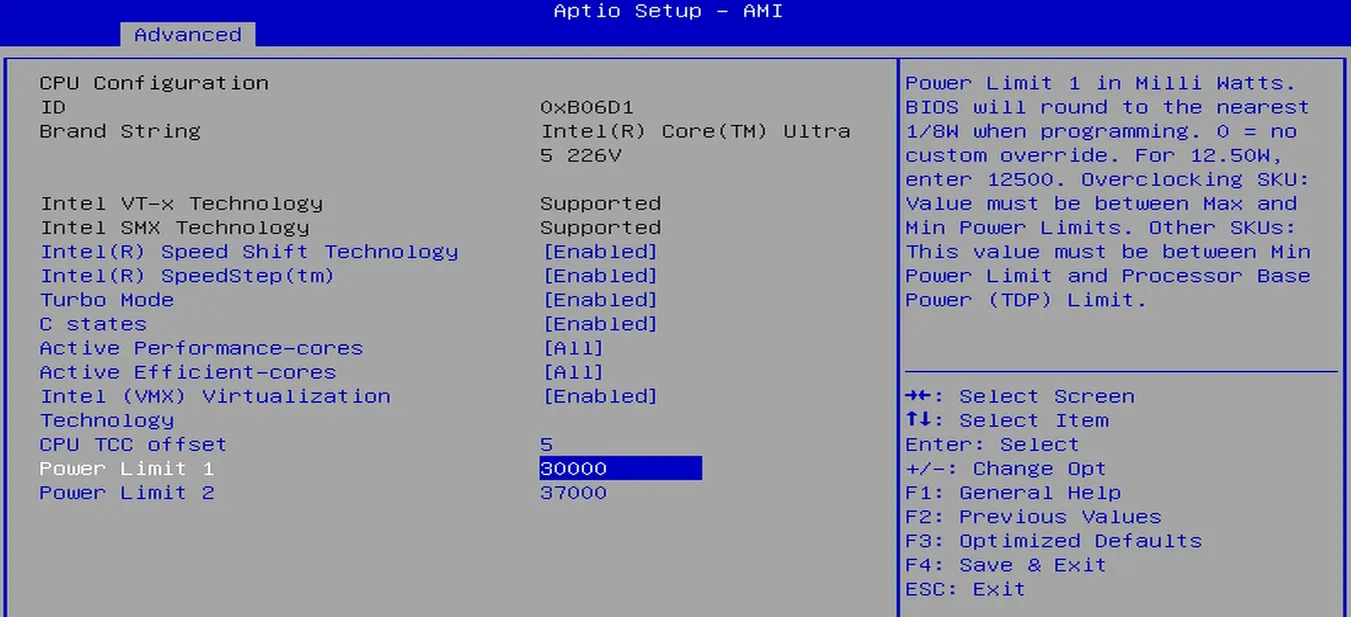
-
After these settings, select
Save Changes and Reseton theSave & Exitpage to save the BIOS settings.
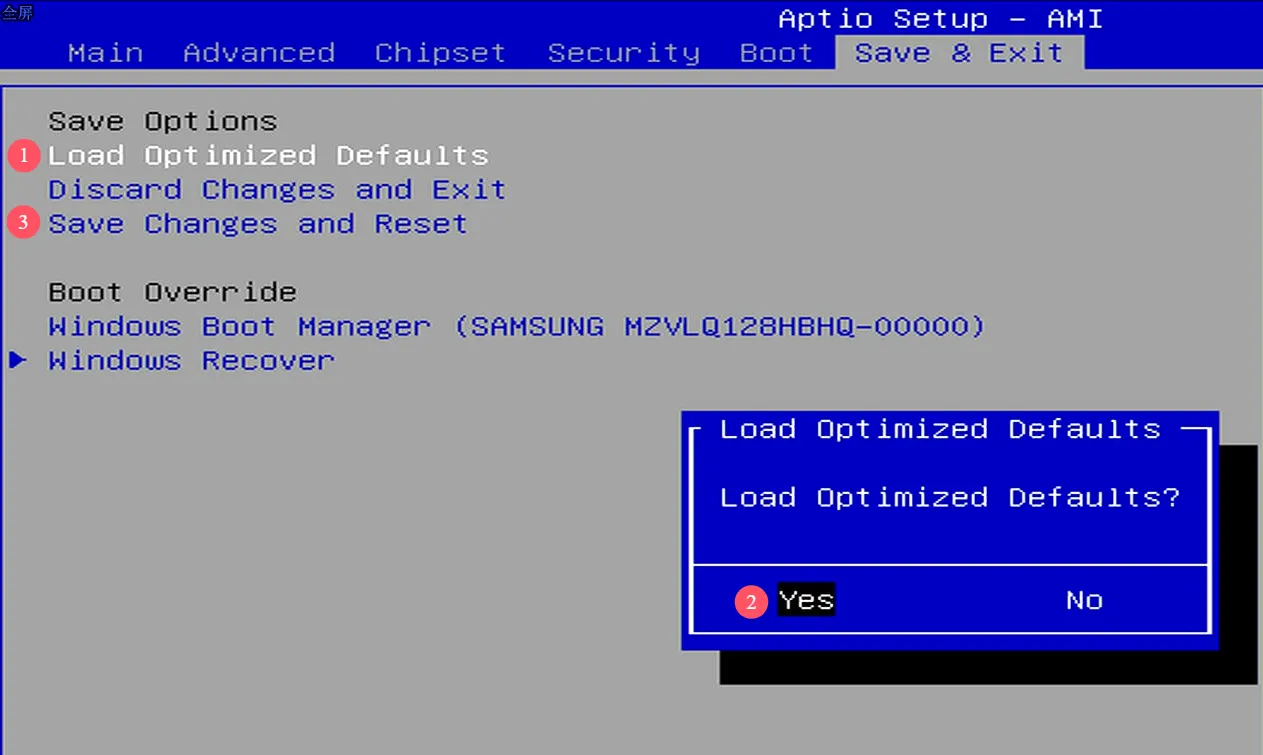
Restore via BIOS Setup
-
After entering the BIOS setup, navigate to the following path:
Save & Exit --> Load Optimized Defaults -
Press Enter to select it, then in the pop-up dialog box, press Enter again to select
Yes. -
Select
Save Changes and Reset, then in the pop-up dialog box, selectYes. -
After these settings, the BIOS will be restored to its factory default values.