Windows Installation
This guide will walk you through the process of installing Windows on your LattePanda Mu Ultra.
Windows 11 Recommended
As the LattePanda Mu Ultra features a hybrid processor architecture with Performance-cores and Low Power Efficient-cores, Windows 11 is recommended for more optimized thread scheduling and improved performance and power efficiency.
Official Windows 11 Recovery Image
This image comes with all hardware drivers and is ready to use, providing you with a fast and ultimate experience.
It does not update in real-time. Therefore, if you need to install the latest version of the Windows OS, you will need to download it yourself and install the drivers.
Preparations
- Empty USB flash drive (8 GB or larger)
- 💿 OS Disc Image File for the LattePanda Mu Ultra: Download from Dropbox or Google Drive
Storage Requirement
Since the LattePanda Mu Ultra does not include built-in storage, please ensure you have already installed an M.2 SSD on your carrier board before proceeding with the OS installation.
Installation Steps
-
Download the Windows disc image file for LattePanda Mu Ultra from the links provided above.
-
Format your USB flash drive to NTFS format.
-
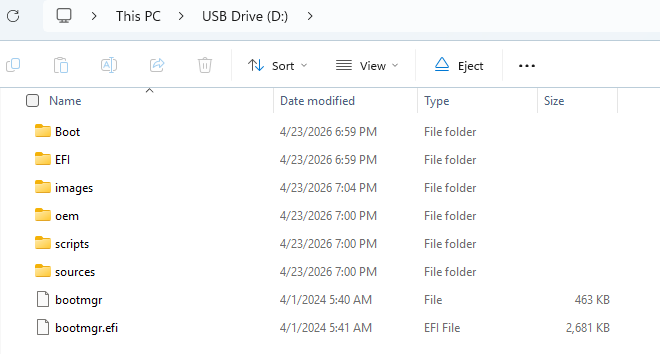
Extract the downloaded Windows disc image file (.7z format), then copy all extracted files and folders to the root directory of your USB flash drive.
The file structure on your USB drive should look like this:
-
Insert the USB flash drive into your LattePanda Mu Ultra (via the carrier board's USB port) and power on the device.
-
Immediately after powering on, press the Del key repeatedly to enter the BIOS setup utility.
-
Navigate to the
Save & Exitpage. You will find aBoot Overrideoption. Use the Up or Down keys to select your USB flash drive from the list, then press Enter.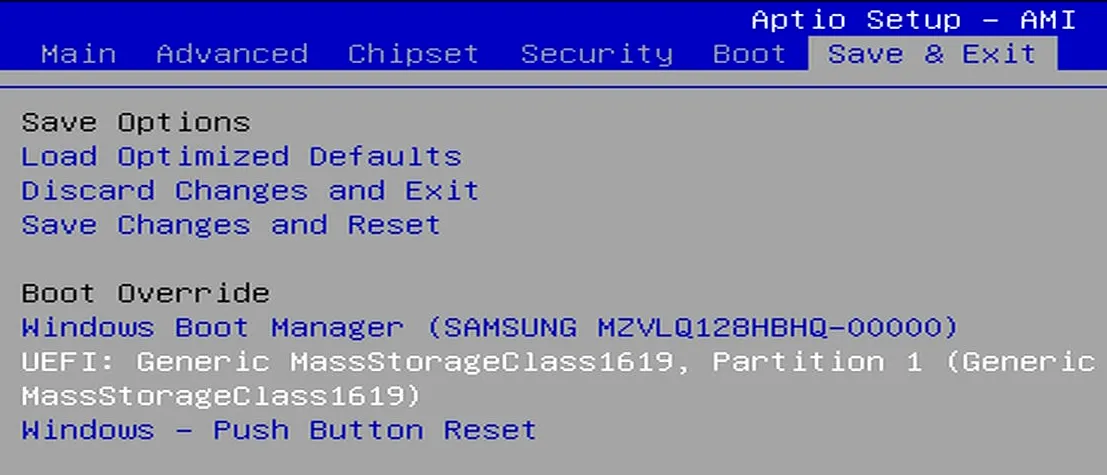
-
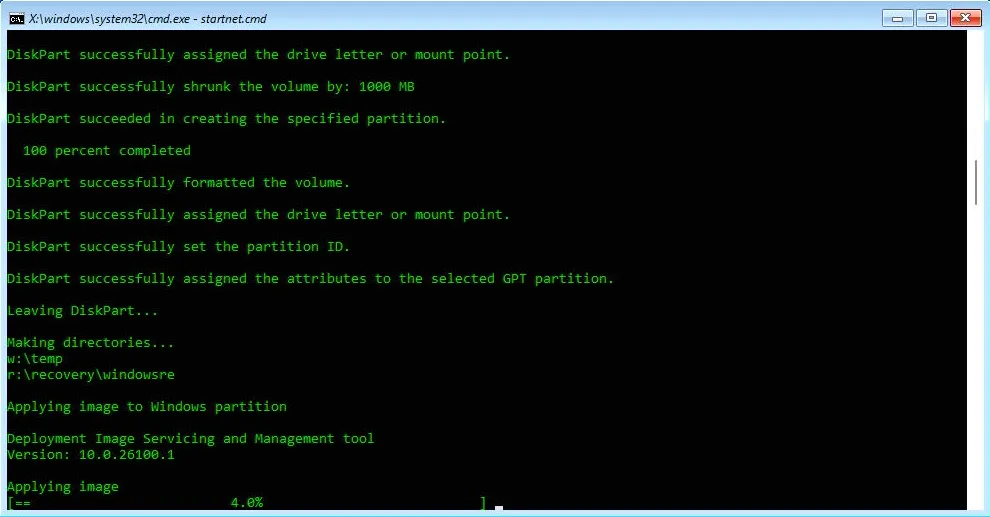
It will boot into the OS installation terminal. The installation process is fully automatic and requires no user intervention. Please wait patiently for approximately 5-8 minutes.
-
After 5-8 minutes, the installation will complete, and you will see a confirmation message in the terminal similar to the image below.
Then remove the USB flash drive, type
EXITto reboot the LattePanda Mu Ultra.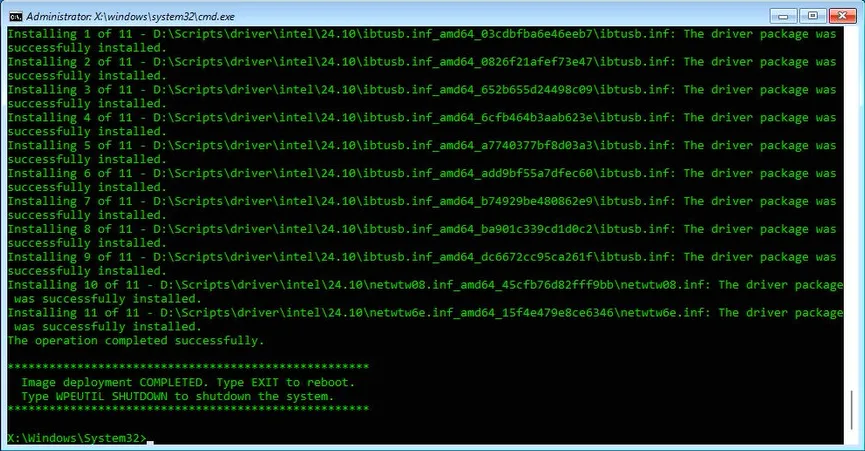
-
The system will begin the Windows initialization process. After 2~3 minutes, you will be greeted with the Windows desktop.
Congratulations! Your LattePanda Mu Ultra is now ready to use.
Standard Windows Installation
If you prefer to install a different version of Windows or perform a clean installation, you can follow the standard Windows installation procedure. The LattePanda Mu Ultra runs a full version of Windows, so the installation process is similar to that of a regular laptop or desktop computer.
Installation Steps
-
Download Windows OS Image
Visit the Microsoft Software Download page and download the Windows ISO file for the version you need.
-
Create Bootable USB Drive
Use a tool like Rufus to create a bootable USB drive from the Windows ISO file.
- Launch Rufus
- Select your USB drive
- Choose the Windows ISO file
- Click START and wait for the process to complete
-
Boot from USB
Insert the bootable USB drive into your LattePanda Mu Ultra (via the carrier board's USB port) and power on the device. Press Del repeatedly to enter the BIOS settings. Navigate to the boot menu and configure the system to boot from the USB drive.
-
Install Windows
Follow the on-screen instructions to complete the Windows installation process.
-
Install Drivers
After Windows is installed, you will need to install the necessary drivers for optimal performance. Please refer to our Download Resources section to download and install all required drivers.
Driver Installation Order
We recommend installing the chipset driver first, followed by other drivers. After installing all drivers, restart your system to ensure all changes take effect properly.